
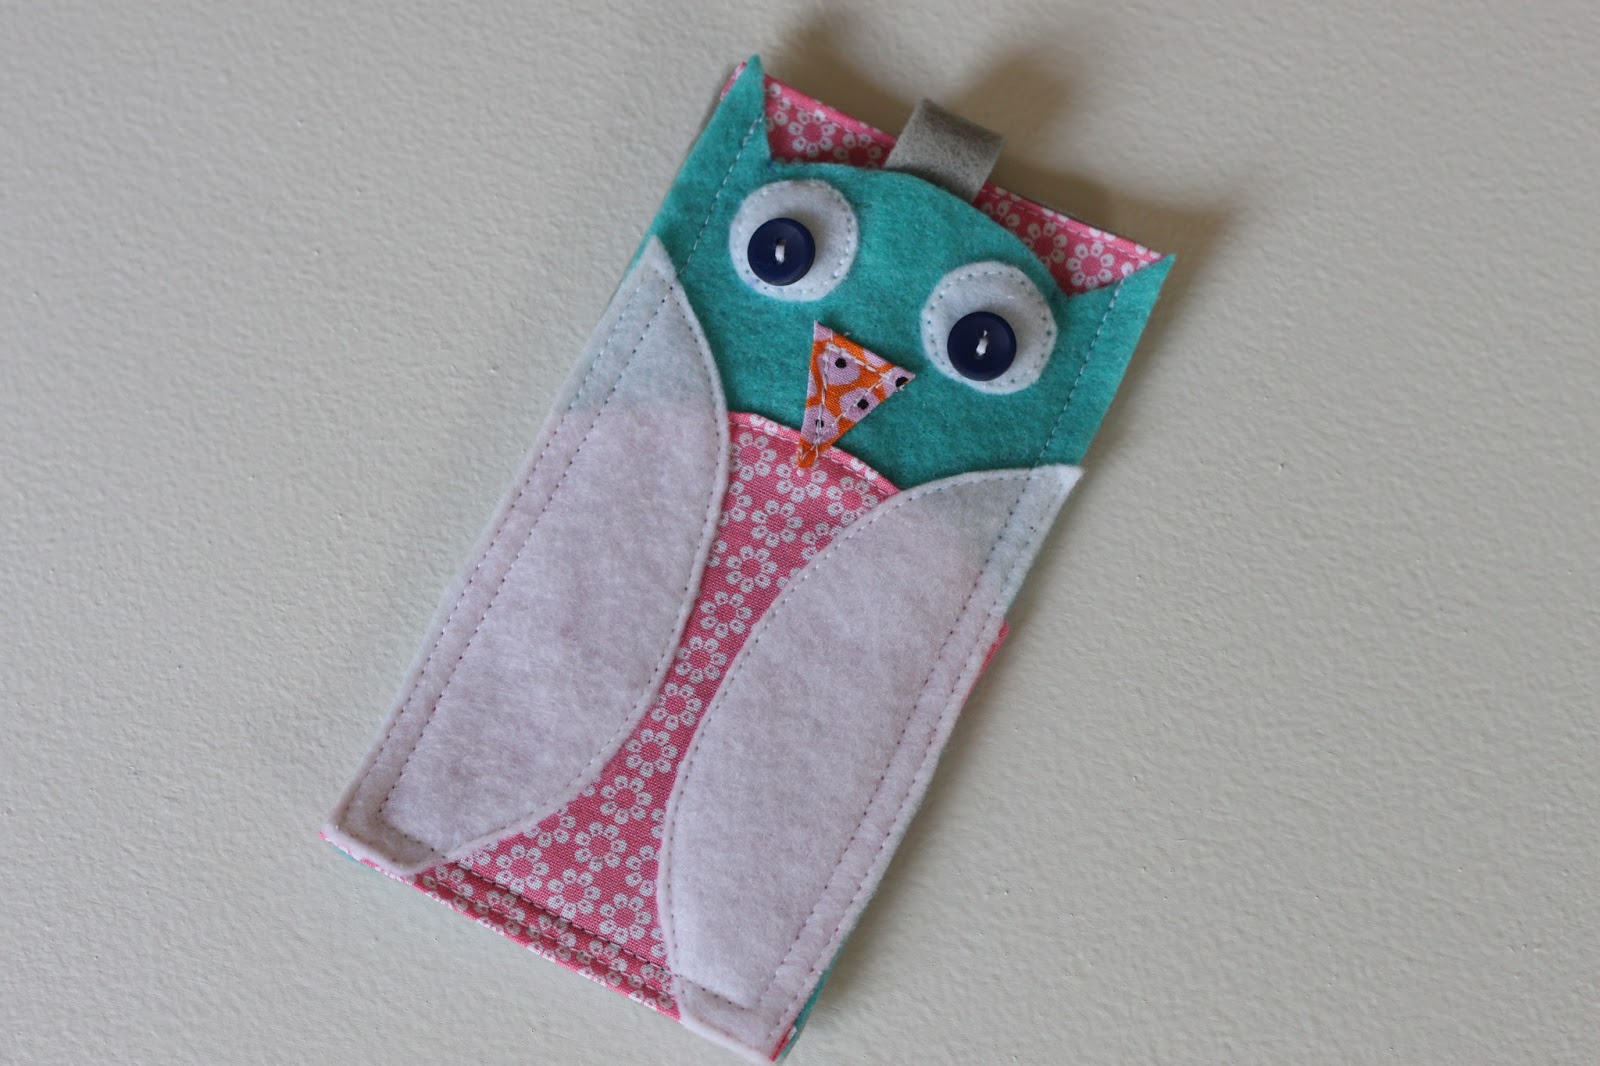
Tutorial - Owl Case For iPod Touch
Today I have a really fun and adorable little project to show you! And since it's just so cute, I know you're going to want one for yourself, so I'll show you how to make it!

For my sister's birthday, she not-so-subtly hinted that she would like an owl case for her iPod Touch. I really didn't mind, I'd rather give her something that I know she really wants than shopping for hours on end and not finding the exact right thing! That, and I really love giving handmade gifts!
I looked online for some ideas, Etsy had a lot of inspiration, and then came up with this design that I thought was cute. This is a great project to use up a few scraps as well!
What you will need:
- Felt, 2 or 3 colors
- Fabric scraps
- 2 buttons
- Velcro dot
- Hot glue gun
- Sewing supplies

The dimensions I'm giving are for an iPod Touch.
Begin by cutting 2 pieces of felt *SIZE: 5 1/4" x 3 1/2"* for the front and back of the case. I would have preferred to use the turquoise for both front and back, but since I was using scraps, I had to go with 2 colors. I think it still turned out pretty good though. :) Also cut out a strip of felt for your strap closure, measuring: 3/4" x 2 1/2".

Next fold your front piece in half and mark the center with a dot with a disappearing ink pen.

Then free hand an owl "head" shape, and cut out. The horns or "ears" should be cut down from the top no lower than 3/4 of an inch. See picture. The tiny dots you see are my 3/4" markings.

Cut out 2 fabric pieces *Sizes: 3 1/4" x 4 1/2" for the belly and 5 3/4" x 4"* for the lining on the back piece (The lining piece is not pictured).

Round the top of the belly. I traced around a bowl so I would get an even curve.
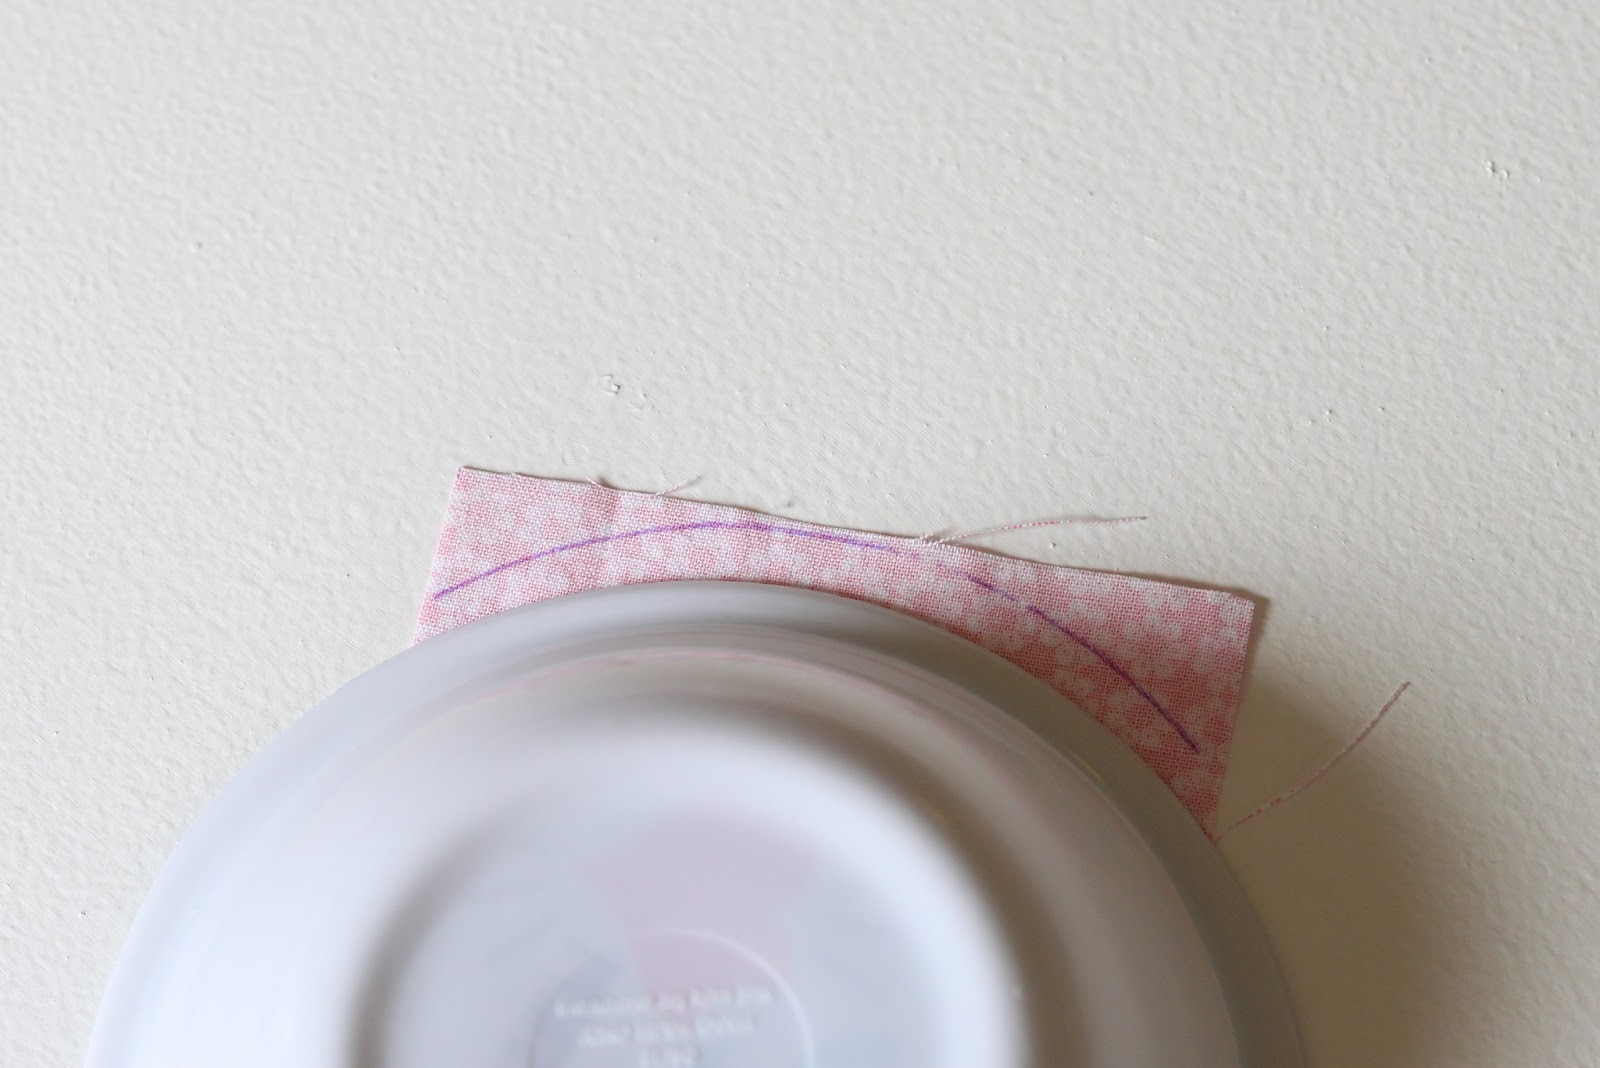
Cut out the curve and clip it with approximately 1/8" snips.

Fold and iron all the edges under 1/4".

Fold and iron the edges for the lining piece.

Pin the belly piece to the front and sew 1/8" from the edge.

Next add your velcro dot closure. I chose to use hot glue for this. Place the hook (rough) side of the velcro on the back side of the front of the case. (Whew!)

Then glue the loop (soft) side of the velcro on the felt tab. Insert the tab in the center, between the back of the cover and the lining. Sew the lining to the back of the cover 1/8" from the edge.

Next we will be making the wings for the owl. I traced around this little bowl to get more of an oval shape. Trace or free hand your wing shape. Then cut out.

Place the wing on your owl (it's beginning to take shape!!) to see if it's how you like it.

I liked this one turned out so I traced the first wing to make an exact duplicate.

Now cut out 2 small circles for the eyes. I used a bottle with a skinny neck (a wine bottle would work) and traced the opening to get this size. My free handed circles don't look so good :)

Place buttons and decide where you want the eyes to be.

For the beak, I cut a triangle slightly larger than I wanted it and turned each side under 1/8" inch, one at a time, and stitched. Then I trimmed the excess fabric left at the corners. Decide where you want your beak to be.

I played around with his eye placement a little and decided I liked this best.

Hand stitch the buttons to the felt circles, then hand stitch the eyes to the front of the case

Next, sew the wings and beak in place, again sewing 1/8" from the edge. Lastly, sew the front and back of the case together using a 1/4" seam allowance.

You're DONE!

Sit back and admire your adorable little owl case :)
Thanks for stopping by
and
Happy Sewing!!!
Linking up here:

No comments
Post a Comment
Jump in the conversation! Leave some comment love...